Integrating Hyperic in vCenter Operations
Integrating Hyperic within VCOPS is fairly simple and similar to integrating other solutions. VCOPS uses adapters to establish this integration.
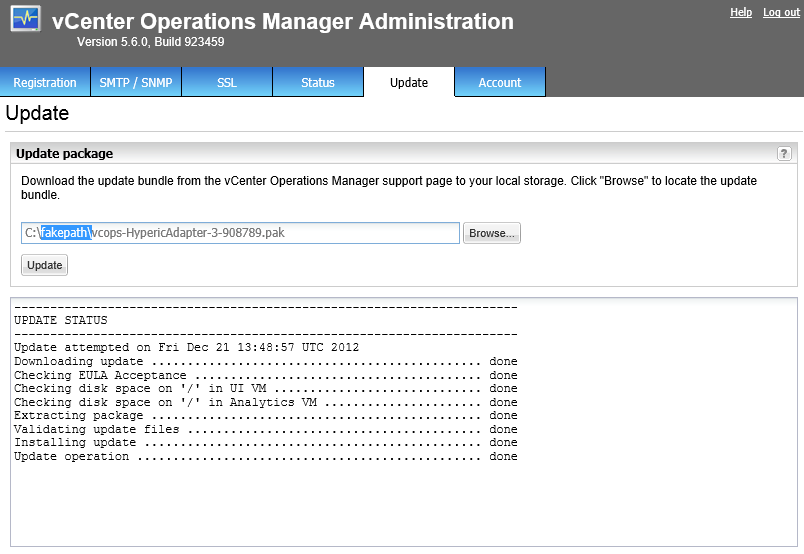
First step is to install the Hyperic adapter, this process is the same as updating the VCOPS installation. Open the update tab in the administration portal.
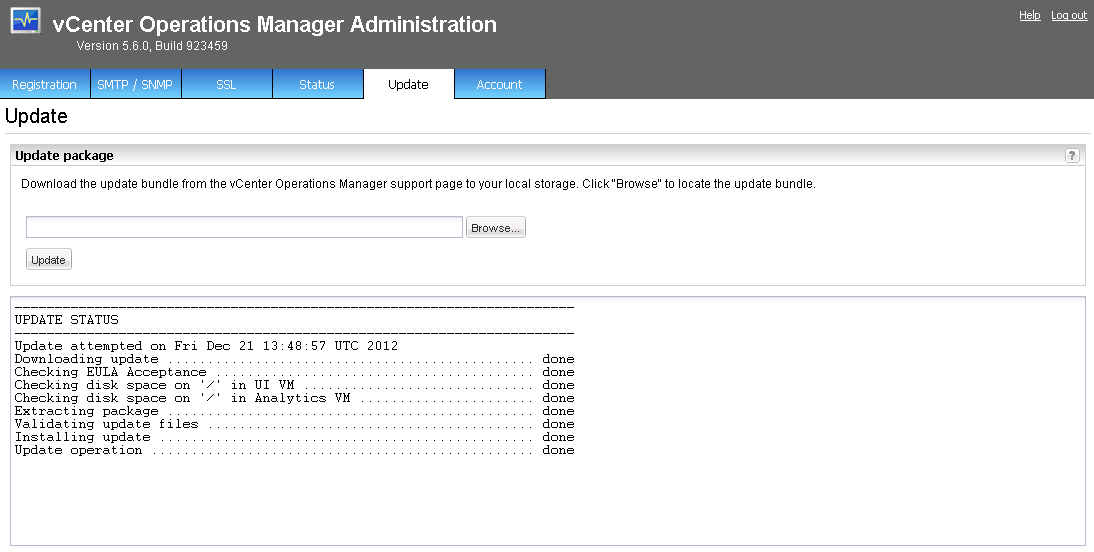
Point the update field to the Hyperic adapter .pak package you downloaded earlier and hit update. VCOPS will now install the Hyperic adapter. Installling an adapter is the same as updating VCOPS.
Once the Hyperic adapter is installed return to the VCOPS custom UI, accessible trough https:///vcops-custom/.
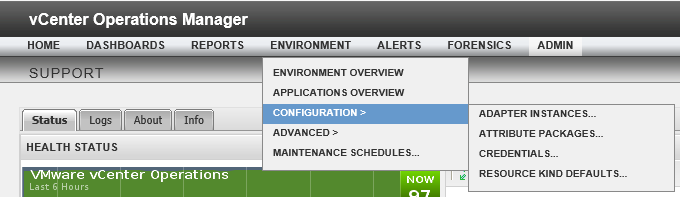
Next step is to add a new adapter instance. Go to Environment > Configuration > Adapter instances. You’ll see an overview of the already installed and configured adapters.
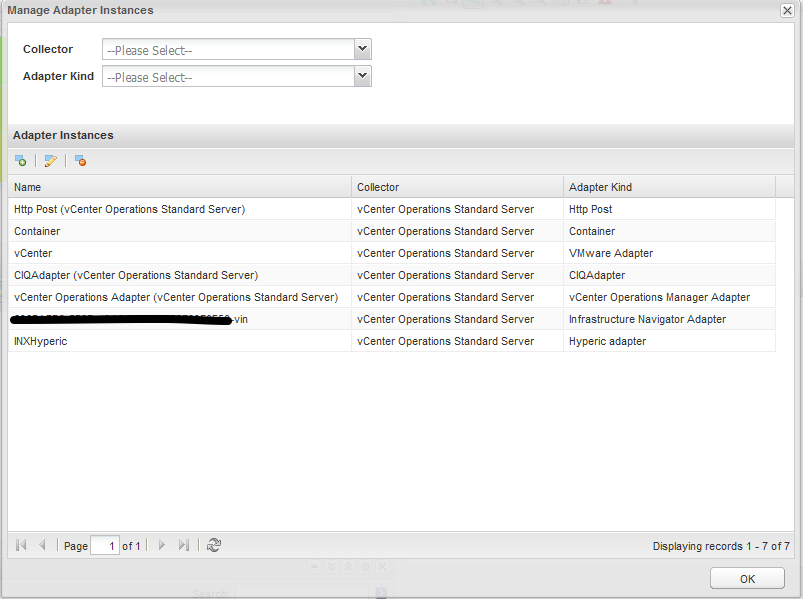
Click on the plus symbol to add a new adapter.
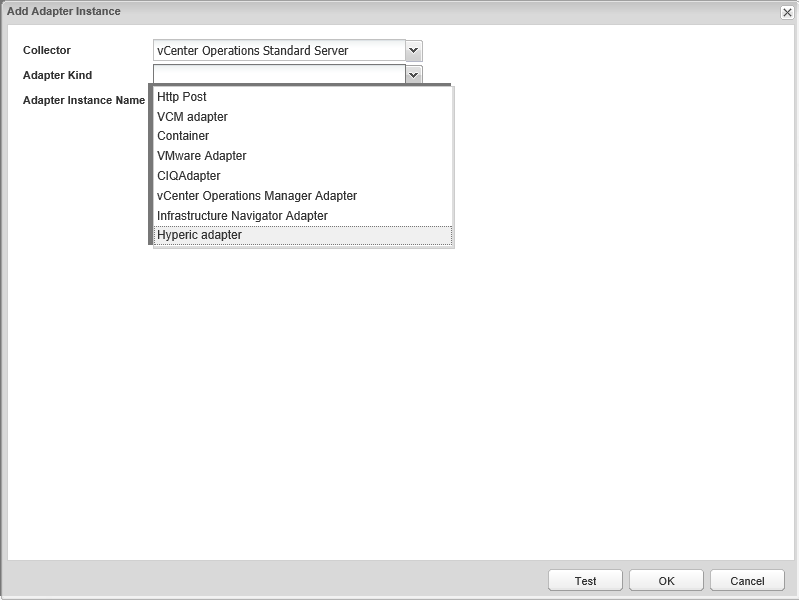
Select Hyperic adapter as the adapter kind and enter a name for the new adapter. Select the newly created adapter and click edit on the adapter overview screen to configure it.
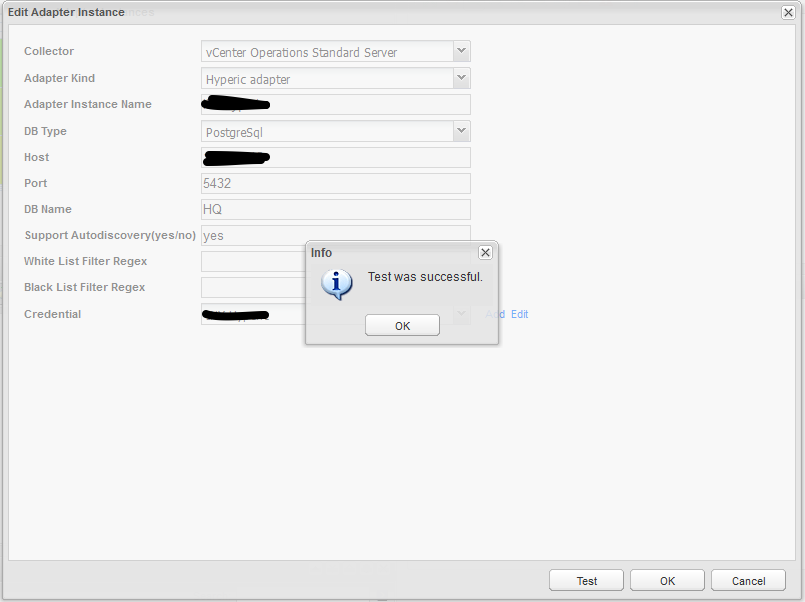
The default settings of the dapter aren’t correct when using the Hyperic vApp and need to be changed.
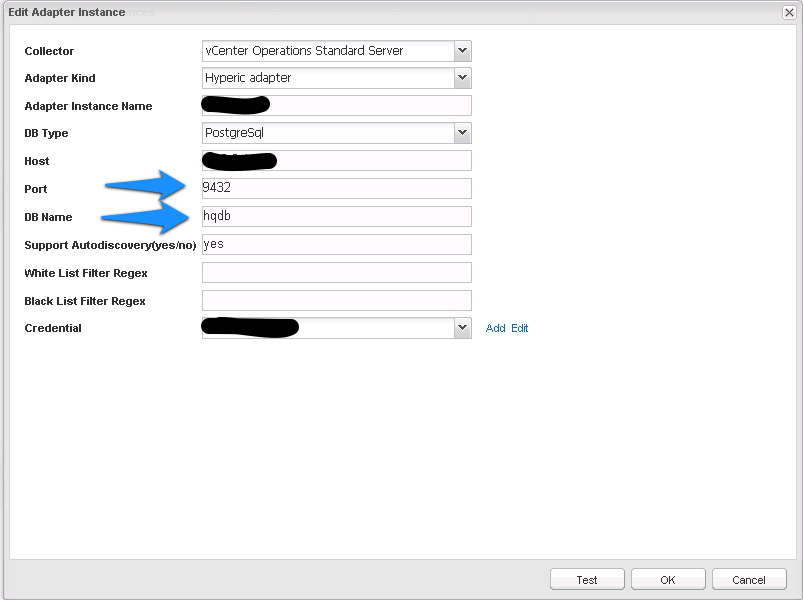
Both the default Port and the default DB Name value are wrong. The port needs to be changed to 5432 and the DB Name to HQ.
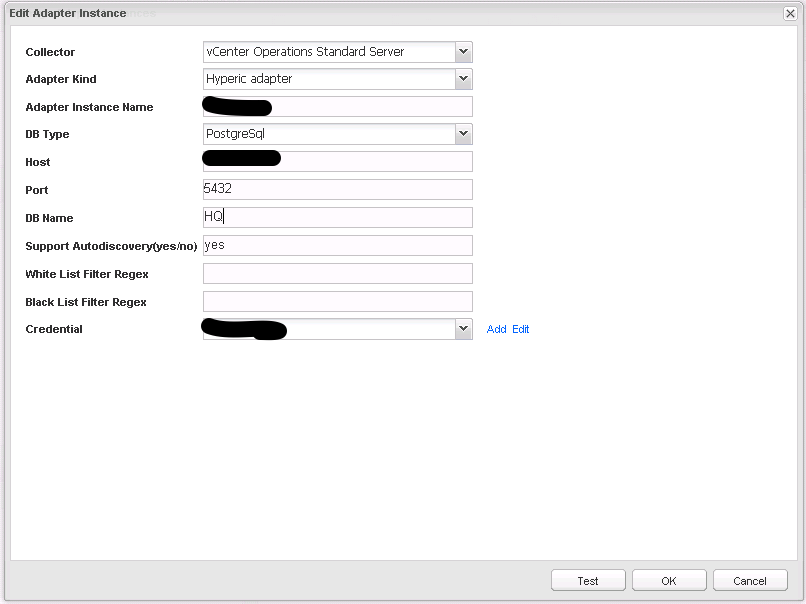
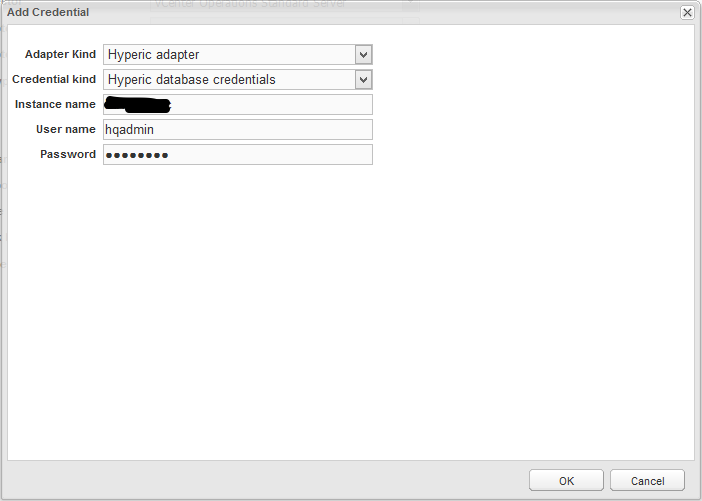
Add a new credential to connect to the Hyperic instance. Select Hyperic adapter as the adapter kind and select the Hyperic database credentials as the credential kind. Enter a name, the admin and the password for the new credential to connect to the Hyperic instance.
Hit the test button to verify the configuration settings of the Hyperic adapter. Click Ok to apply the newly configured adapter. Hyperic is now integrated within VCOPS.